Fuchsias are the prettiest flowers I am making these for a competition cake later in June. I'll be taking pictures at each stage and writing instructions in the form of a tutorial.
Here are some real fuchsias. The colours and shapes are so varied. I'm making a purple and dark pink colour combination and I'll be making them double; similar to the one below, but opposite with the darker petal on the top.


- Colour the paste you will use for the petals. You need three half stamens and one long stamen for each flower. Cut the tip off the long one.

- Cut a 3" piece of 26 or 28 covered wire and bend a little hook at the end.
- Take a small piece of paste and form it into a small rectangle.

- Moisten very slightly, the inside of the paste and wrap it around the stamens and wire at the join.

- Roll gently with your finger, back and forth, until the paste has spread up and down the wire and is smooth.

- Leave to dry.
- This is the set of fuchsia cutters. and the tooling pad I am using.

- To make the first row of petals start with a small ball of paste and form it into a "Mexican hat".
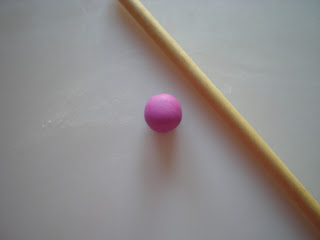
- I used the wooden tooling stick to roll out the paste from the centre outwards, leaving the "hat". If the "hat" part gets too long, then cut it off.

- Then I placed the cutter over the hat part and cut out the petals. I turned it upside down and put the hat into the hole in my mat.
- I used the ball tool to soften the petals.

- I moved the petals to my board, turned the petals the right side up and used a tooth pick to frill each petal edge. Use a little cornstarch to stop the toothpick from sticking or tearing the paste.

- I made a small hole in the centre of the flower, moistened it, and pushed the wire from the stamens into the hole far enough in so that the paste on the stamens is level with the petal.
- I held the flower upside down by the wire and brought my partly closed hand down over the petals to give them a rounded shape. Hang them upside down to dry.

- To make this a double fuchsia, I cut out a flower, this time without the Mexican hat. Tool it to thin the edges, then frill the edges. I use the wooden tool and a toothpick.

- The I pushed this petal up the wire and on to the Mexican hat part of the flower. I had moistened it slightly.

- Push it all the way up to the base of the other petal, and make sure that each of the new petals is over the space of the first ones.

- Hang to dry. To be continued ....... I have the next step in the process, but I cannot seem to get the photos to the bottom of this post. So I will create another post and place it right below this one........
*********************
"JUST RELEASED!"
My New (August 2011)
*** Flower Tutorial Booklet*****

If you love making gumpaste flowers, please read
about my new Gumpaste Flower Tutorial
which is available in Booklet form or PDF.
The tutorial covers these four lovely flowers:
Tulip, Gardenia, Lily of the Valley and Daffodil.
Check it out at my Etsy shop here
about my new Gumpaste Flower Tutorial
which is available in Booklet form or PDF.
The tutorial covers these four lovely flowers:
Tulip, Gardenia, Lily of the Valley and Daffodil.
Check it out at my Etsy shop here
 |
| Tulip |
 |
| Gardenia |
 |
| Lily of the Valley |
 |
| Daffodil |


%2B(650x228).jpg)


3 comments:
I am very eager to see how these turn out. I've always admired your cake decorating skills...I think if there were a group who met close to where I live I might even give it a try...Really lovely...
Thanks for your nice comments. For everyone else who has visited to look at the fuchsia tutorial, I will be completing it early this week.
Hi! Thanks for this tutorial! How did you get that nice fuchsia color for your gum paste?
Post a Comment